Hallo Internet,
I picked up a cassette of 126 film at a flea market a couple of weeks back. I developed the photos that were on it and posted them online. Here are the results:
http://www.flickr.com/photos/msmoynihan/sets/72157634892900398/
The film was just standard C41 film and so I put it through a standard C41 process. The image quality is poor, but then again, the images aren't exactly thrilling either.
So, if you want to see someone else's poorly-taken, poorly developed, highly degraded holiday snaps from c1983, take a look. If you don't, I won't blame you.
Matthew
Thursday 1 August 2013
Saturday 22 June 2013
Trichromes Part II
Two my two dear followers - you've stuck around for the 15 months since my last post. Here is a reward:
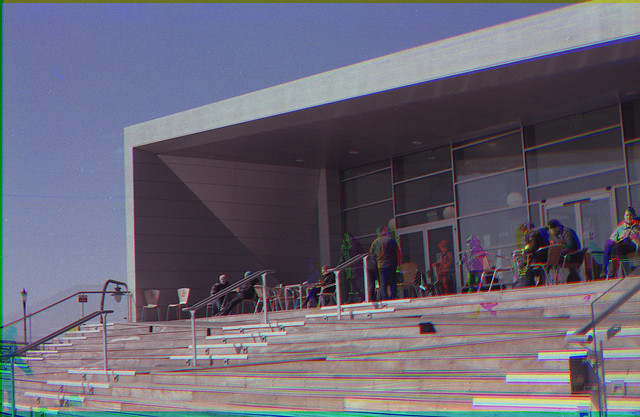
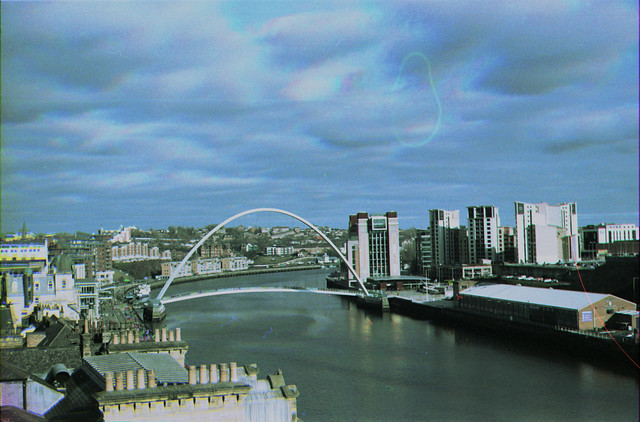
I've made some more Trichrome images using HP5+ film exposed at EI 200 through RGB filters and developed for 10mins at 19C in HC-110 dilution H.
Layers were manoeuvered and colourised using GIMP and the instructions found here.
You can also use Paint.NET for this; the two are extremely similar.
Another blogger has also given a good explanation here.
This technique has been around since James Clerk Maxwell, who, in his time between deriving the fundamental building blocks of electromagnetism and reducing them into four extremely simple equations (which are a total nightmare to actually use, I might add - the bane of my third year of my physics degree) decided that he might like to have a colour photograph of some tartan that he owned, rather than a boring black and white one that didn't show all the lovely colours in it.
He took pictures through coloured filters, and then projected the three images back through the same filters that he had used to take them. The resulting picture - the first colour picture ever taken - can be found here.
Anyway, here are my pictures. You can see things that have moved by the fact that they're monochrome primary additive colours (R,G,B if they were white) or monochrome primary subtractive colours (C, M,Y, if they were dark).
Monday 9 April 2012
Accelerated E-4 in C41 chems.
A long time ago, I found a roll of exposed film. It was some form of Gevaert film, and colour at that. I developed it in B/W chems (I don't recall which ones), and tried to scan it. The negatives were far too thick, because the colour couplers were still in the emulsion. It was just about discernable that there were images on the film, but other than one of some horses, it was impossible to tell what they were of, even looking through the negatives at a 100W bulb.
Several years later, I have finally got round to doing what I had originally intended: I have bleached the negatives using re-halogenating bleach (from a sepia toner pack) and re-developed using RT C41 chems.
The results are in no way perfect, or even acceptable to any but the most curious, but it is possible to see what the images were of - mainly studio shots of a blonde girl aged about 20. There are a few others out and about around Durham (in the N.E. of England). A 645 camera had been used.
Anyway, here are the results. My recipe was vague, I simply bleached until there was no image left (the emulsion went kind of creamy), washed the film a lot, then shone a bright light at it, and redeveloped in C41 chemicals. I didn't time any of the steps, as they are all "to completion", so I just left it for as long as I thought might be necessary - 20 minutes or so.
Here are the images:
http://www.flickr.com/photos/msmoynihan/sets/72157629775142653/
Sunday 4 December 2011
E-2 (1968) in room temperature C41
OK so I haven't made any updates in forever, so here's a good one. I developed some E-2 Ektachrome-X which expired in the late 60s in room temperature C41 chemicals. The images were exposed recently (about 18 months ago, if I remember correctly) It's a bit cold here, so that's a slight lie, I did warm the chemicals from actual-quite-chilly room temperature to 72F, so that it would be the same temperature as yarnzombie used when he did E-4 in room temperature C41.
He used the following recipe, which I copied:
All at 72 Farenheit
Colour developer: 20mins
Blix: 8 mins
Wash
Stabiliser: a minute or so.
I've then hung the negatives above the radiator to dry.
There appears to be images on them, although they're fairly monochrome-looking, and a bright teal colour. The images should be comprised of dyes, rather than silver, as we've blixed the film, although after only 8 mins, there may still be residual silver in the images.
Whether or not there's colour information, I'm not sure, but it's definitely a way of getting an image from ancient film. I'll add images in a couple of hours or so, once the negs are dry and I can scan them.
SCANNED!
http://www.flickr.com/photos/msmoynihan/sets/72157628280654373/
I'm amazed at how good the images are. The variation across the surface made colour balancing difficult, but I think we can see that this has been a successful project! There appears to be a slight pattern from the backing paper, but never mind.
Wednesday 6 July 2011
First DIY C-41
I developed a couple of rolls of C-41 at home today, using a kit that I've been saving up rolls for for ages. I didn't want to let it oxidise, so I saved it until I had 10 rolls ready to develop at once, which I now do, including some funny stuff like E-2 process film that I want to do at room temperature, or by acceleration.
The first results (Portra 400VC in an Olympus XA2) are scanned in, and available to view here.

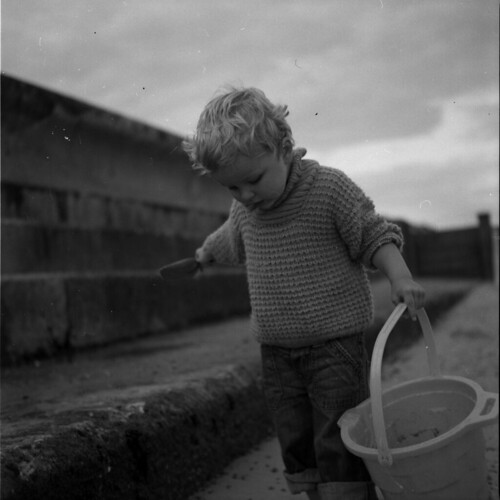
I also scanned my one and only roll of PX in 120, which was some pictures of my son at the beach, viewable here.
The first results (Portra 400VC in an Olympus XA2) are scanned in, and available to view here.
I also scanned my one and only roll of PX in 120, which was some pictures of my son at the beach, viewable here.
Tuesday 15 March 2011
Apology
Hey Readers,
Sorry I haven't posted for a while, I've been working about a zillion hours a day on an academic paper I'm getting published at a conference in April (I'm a PhD student in physics). I've not been home from work before 10pm for a couple of weeks, so obviously sleep is a priority over developing photos and writing about them, as I have to be up for 8 the next day. Hope to be able to update soon,
Best regards, and thank you for reading,
Matthew
Tuesday 25 January 2011
Glass Plate Negative
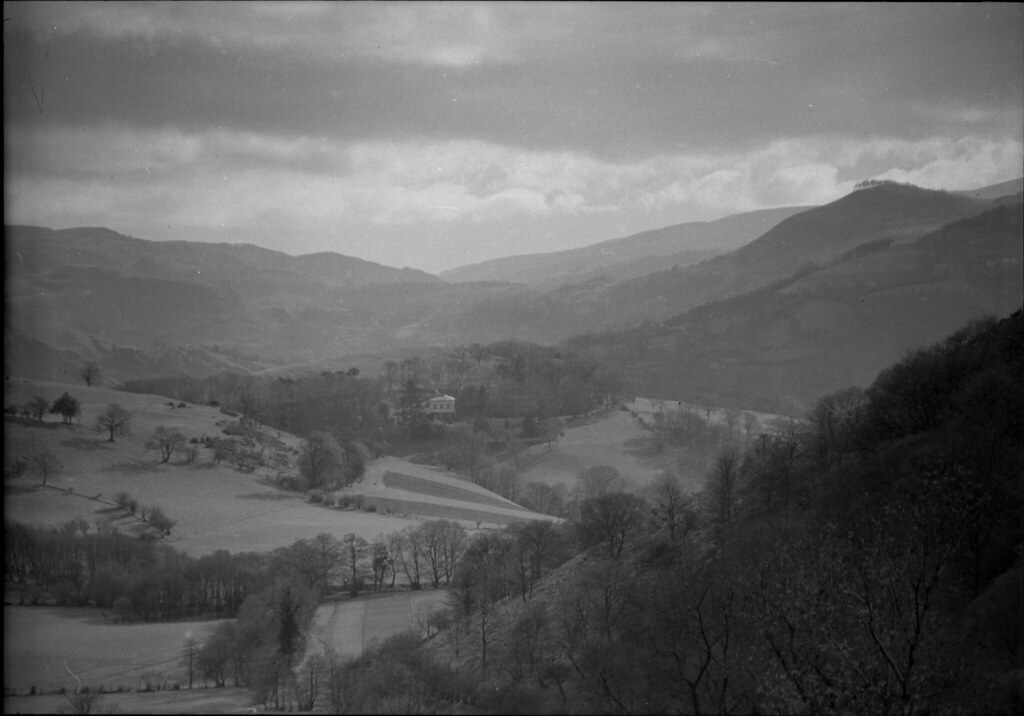
In the Big Bag Of Goodies I bought at the weekend, there was a box labelled "Agfa Isopan ISS" and an expiry date of September 1939, which is when WWII kicked off. When I opened the box, I found not Isopan ISS, but a single glass plate negative of a landscape. I scanned it in using my 4990 and was absolutely astonished by the detail. The exposure is spot on, and some sort of filter has been used (or the spectral response was weird, which is also possible) so I think it's been taken by someone who knows what they were doing.
It's a tiny plate, I believe 2 1/2 by 3 1/3 inches in size, with fairly rough edges, so it may have been cut by the photographer from a larger plate- that's just my conjecture though.
Anywho, enough talking, here's the picture. If you feel like editing the levels/curves to give a punchier image, just let me know and I'll send you a high-res TIFF file. I'm not that great with PS etc., so I'd love to see what can be done with this. The image contains so much detail and isn't blocked up in either highlights or shadows, I'm sure something fantastic could be done with it.
I might even make you a lumen print as reward, if you do something nice.
If you want to see it larger, look here.
Oh, and if you have any idea where this is, tell me!
Subscribe to:
Posts (Atom)